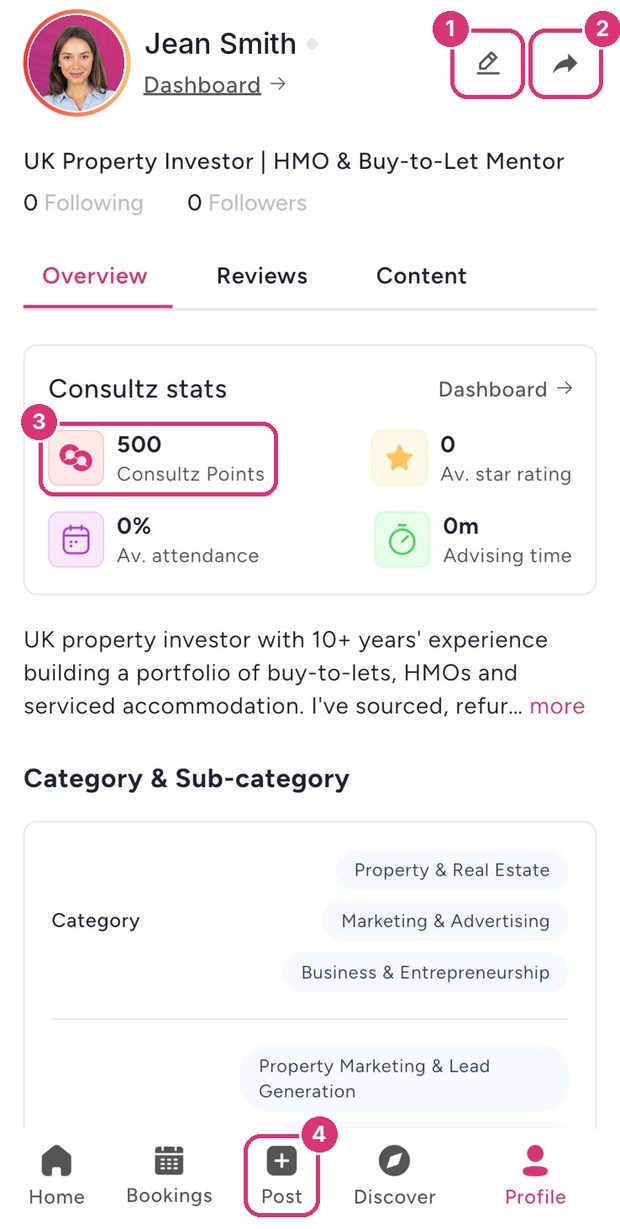
Part 1 of 2
Create your account
Download the app, choose Expert and sign up with your referral code.
Part 1 · Step 1 of 13
Choose “Join as an expert”
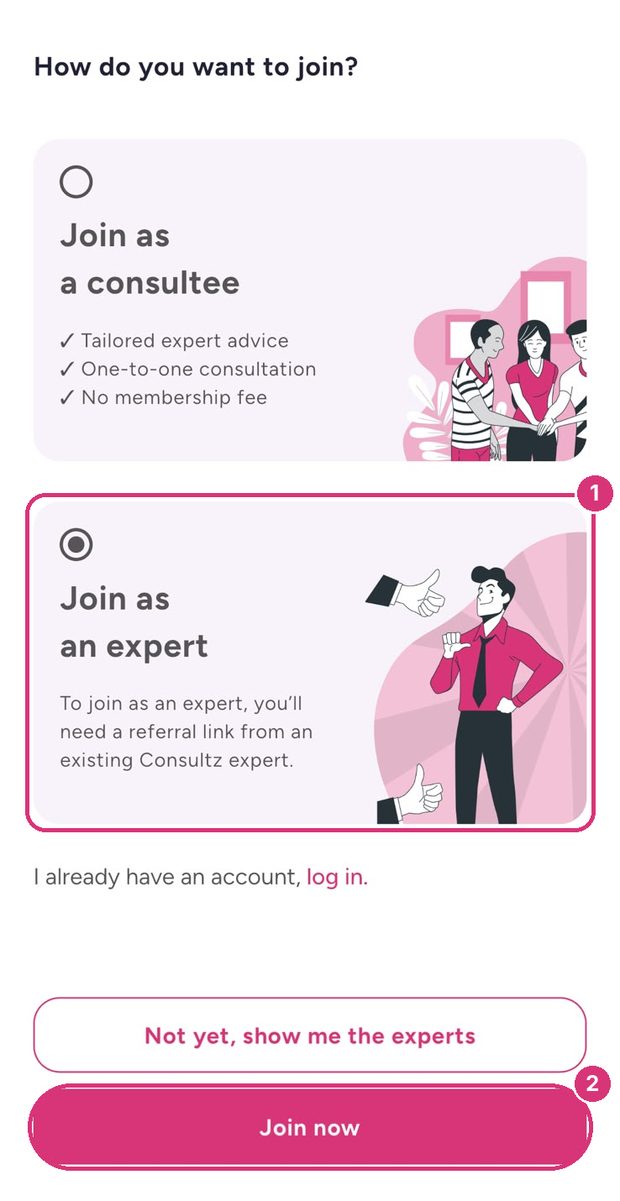
Open the Consultz app. The first screen asks how you want to join.
- 1Select Join as an expert.
- 2Tap Join now.
Don’t tap “Not yet, show me the experts”. That’s for clients browsing the app.


Part 1 · Step 2 of 13
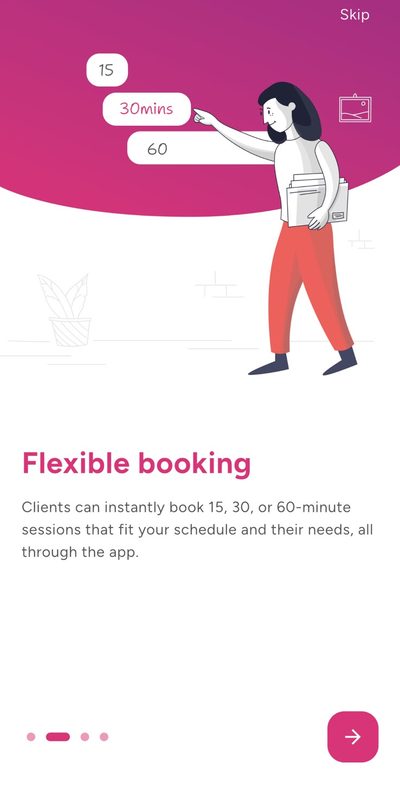
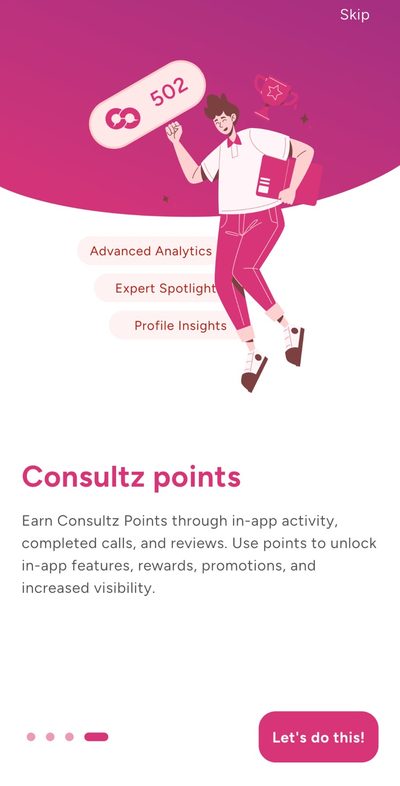
Swipe through the intro
Four quick screens explain how Consultz works. Tap the → arrow on each one, then Let’s do this! on the last. You can also tap Skip at the top right.
Part 1 · Step 3 of 13
Create your account
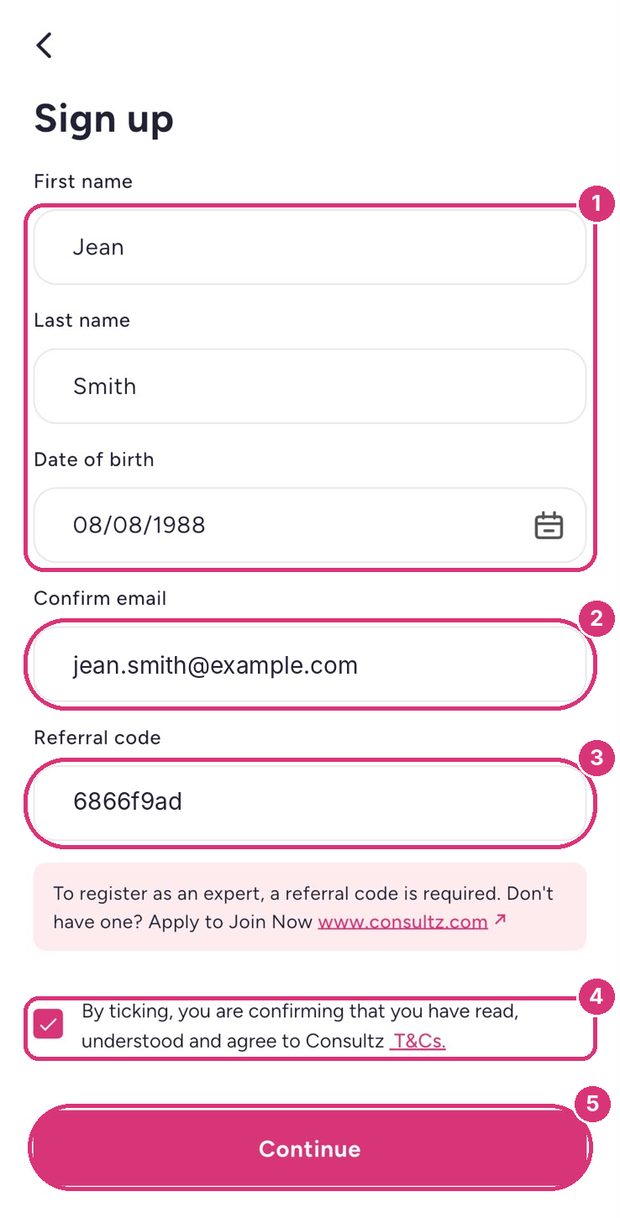
Fill in the sign-up form.
- 1Enter your first name, last name and date of birth.
- 2Enter your email. Use the same email address you applied with, so your account links to your approved application.
- 3Enter your referral code: 6866f9ad.
- 4Tick the box to agree to the Consultz T&Cs.
- 5Tap Continue.
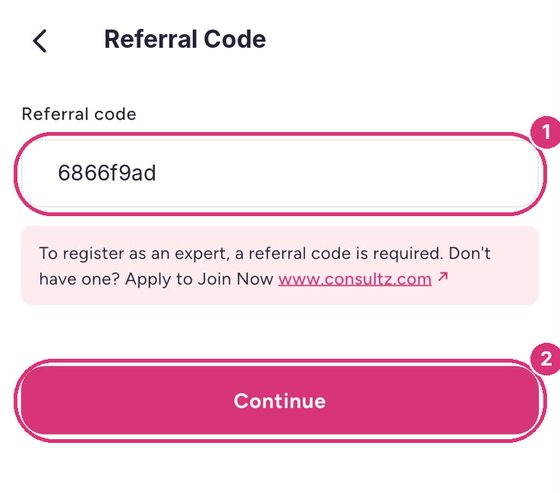
Signing up with Google or Apple?
Tap Continue with Google or Continue with Apple under the form. The app then asks for your referral code.
- 1Enter your referral code: 6866f9ad.
- 2Tap Continue.
Using Apple? If Apple asks, choose Share My Email, not “Hide My Email”. This keeps your account linked to your approved application.
Part 2 of 2
Build your profile
Set your rate, add a photo, write your bio and choose when clients can book you.
Part 2 · Step 4 of 13
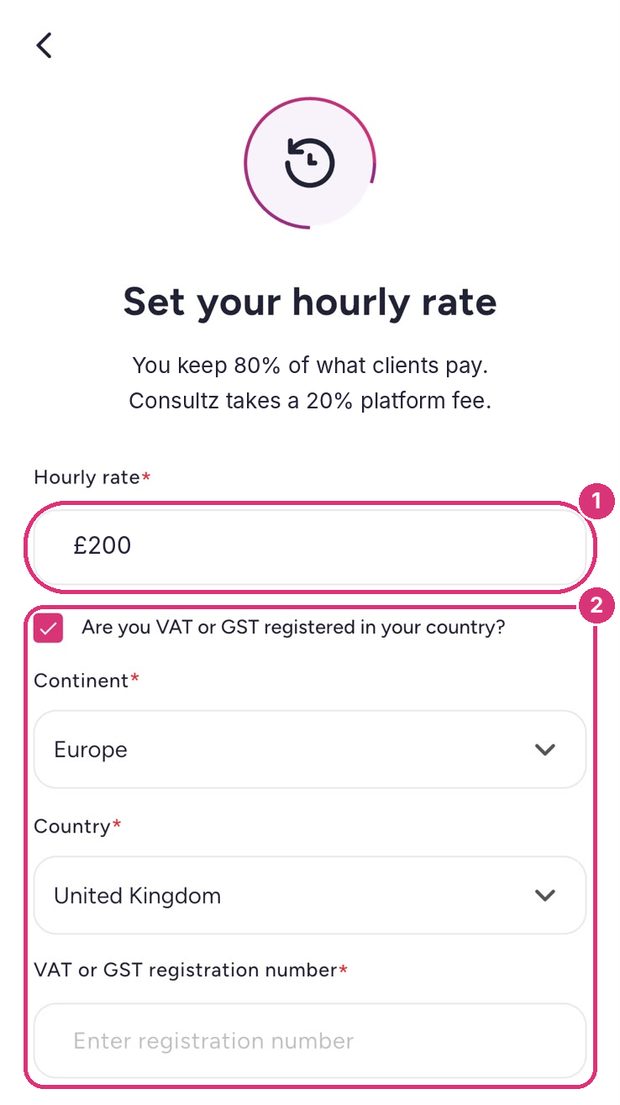
Set your hourly rate
Set the price clients pay for an hour with you. You keep 80% of every booking.
- 1Enter your hourly rate in pounds (£).
- 2If you’re VAT or GST registered, tick the box and add your continent, country and registration number. If you’re not, leave it unticked.
Your 15- and 30-minute session prices are worked out from this rate. At £200 an hour, a 15-minute session costs the client £50.
Part 2 · Step 5 of 13
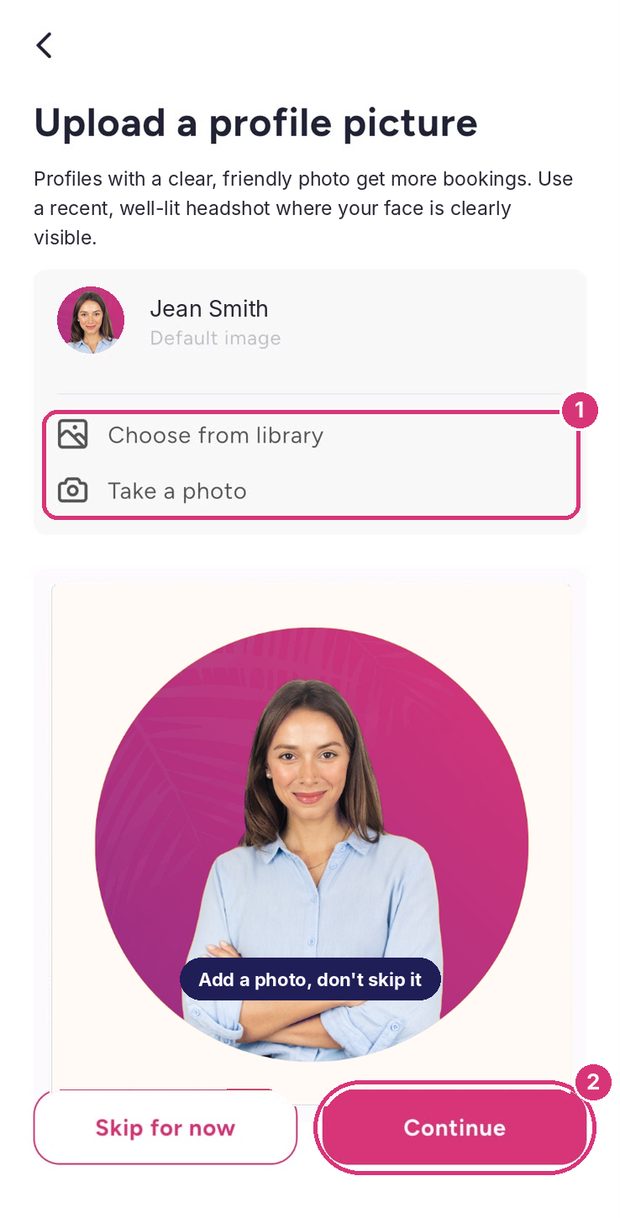
Add your profile photo
Clients see your photo before they book, so this step matters.
- 1Tap Choose from library or Take a photo.
- 2Tap Continue.
Use a recent, well-lit headshot where your face is clearly visible. Profiles with a photo get more bookings, so don’t skip it.
Part 2 · Step 6 of 13
See what’s left to do
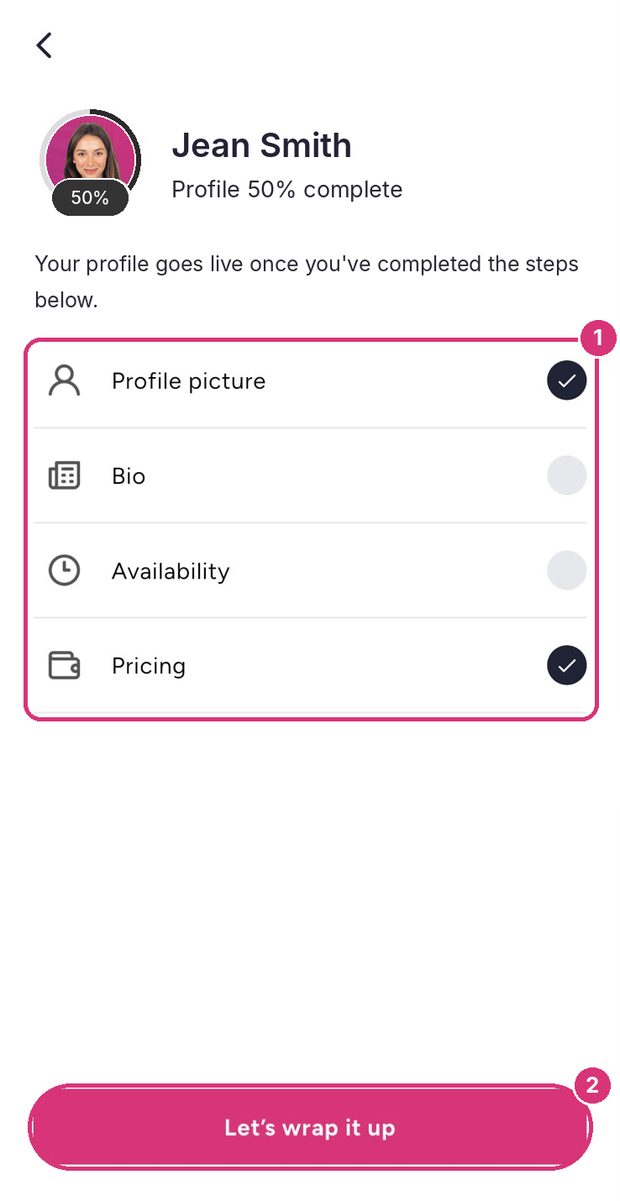
This checklist shows what you still need to do before your profile goes live.
- 1Profile picture and Pricing are already ticked. Bio and Availability come next.
- 2Tap Let’s wrap it up.
Part 2 · Step 7 of 13
Choose your categories
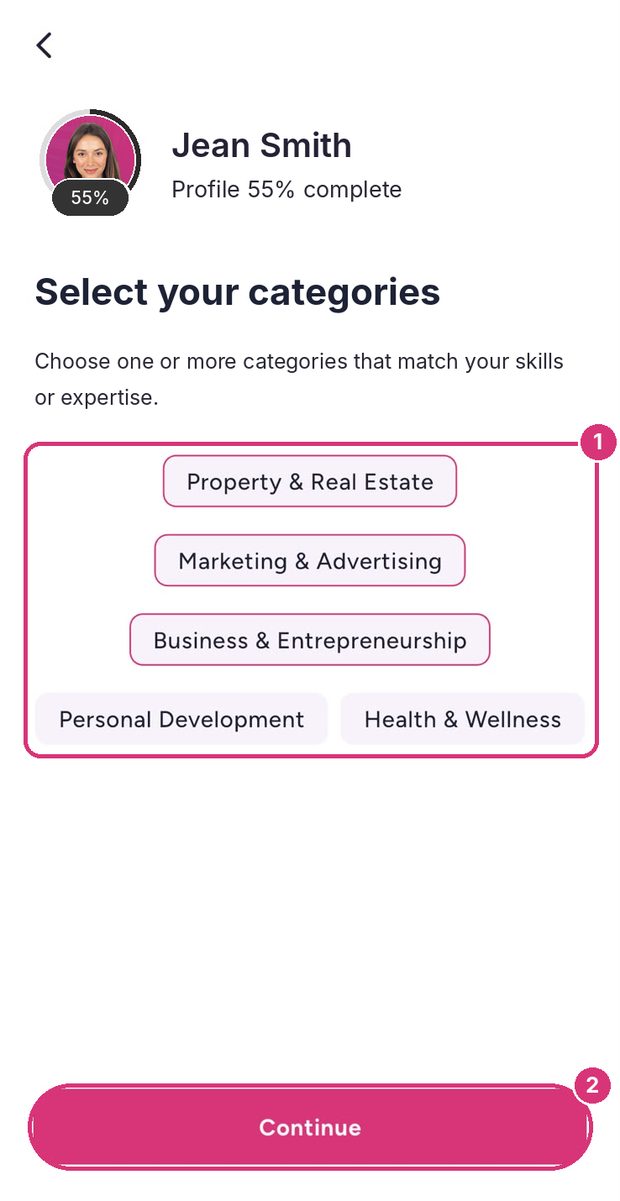
Categories help clients find you.
- 1Pick one or more categories that match your expertise.
- 2Tap Continue.
Part 2 · Step 8 of 13
Choose your sub-categories
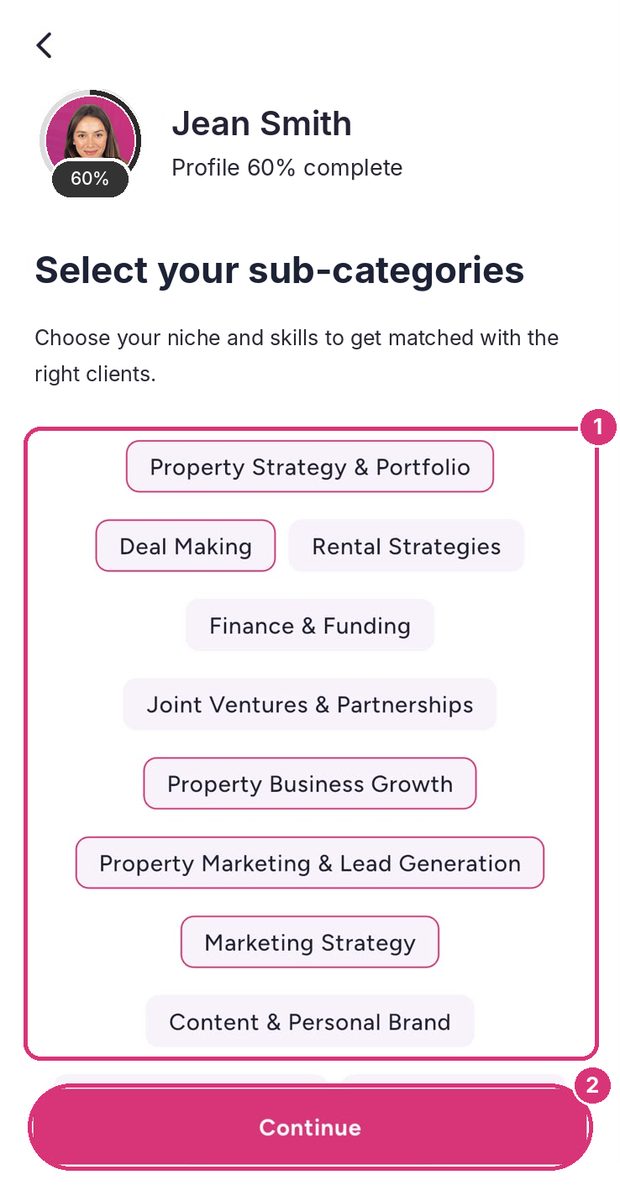
Now get more specific, so you’re matched with the right clients.
- 1Pick the niches and skills you specialise in. Scroll down to see them all.
- 2Tap Continue.
Part 2 · Step 9 of 13
Write your bio
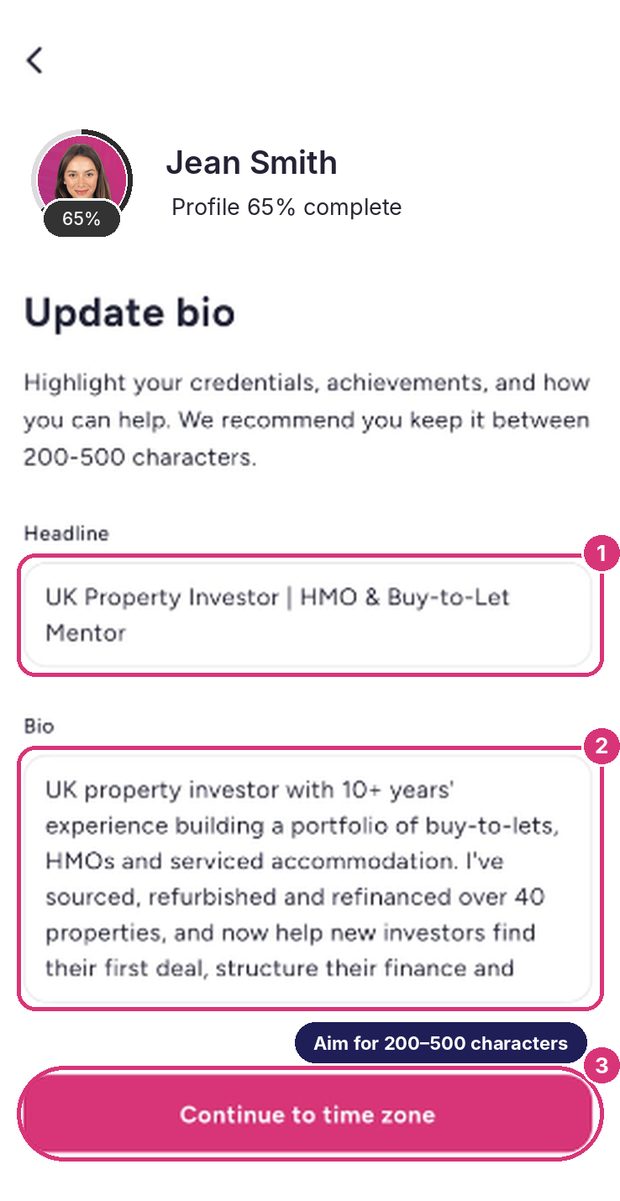
Your headline and bio are the first things clients read on your profile.
- 1Add a short headline, for example “UK Property Investor | HMO & Buy-to-Let Mentor”.
- 2Write your bio in 200–500 characters: your credentials, achievements and how you help.
- 3Tap Continue to time zone.
Lead with your results. Numbers stand out, for example “refinanced over 40 properties”.
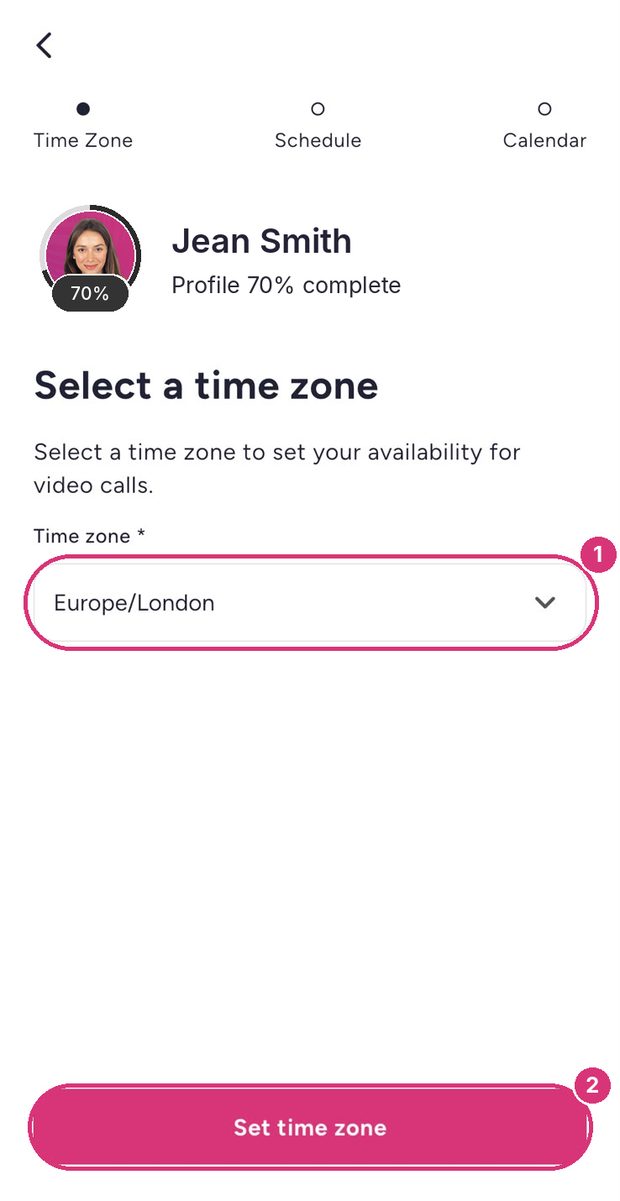
Part 2 · Step 10 of 13
Set your time zone
Your time zone makes sure clients book you at the right time.
- 1Choose your time zone from the list.
- 2Tap Set time zone.
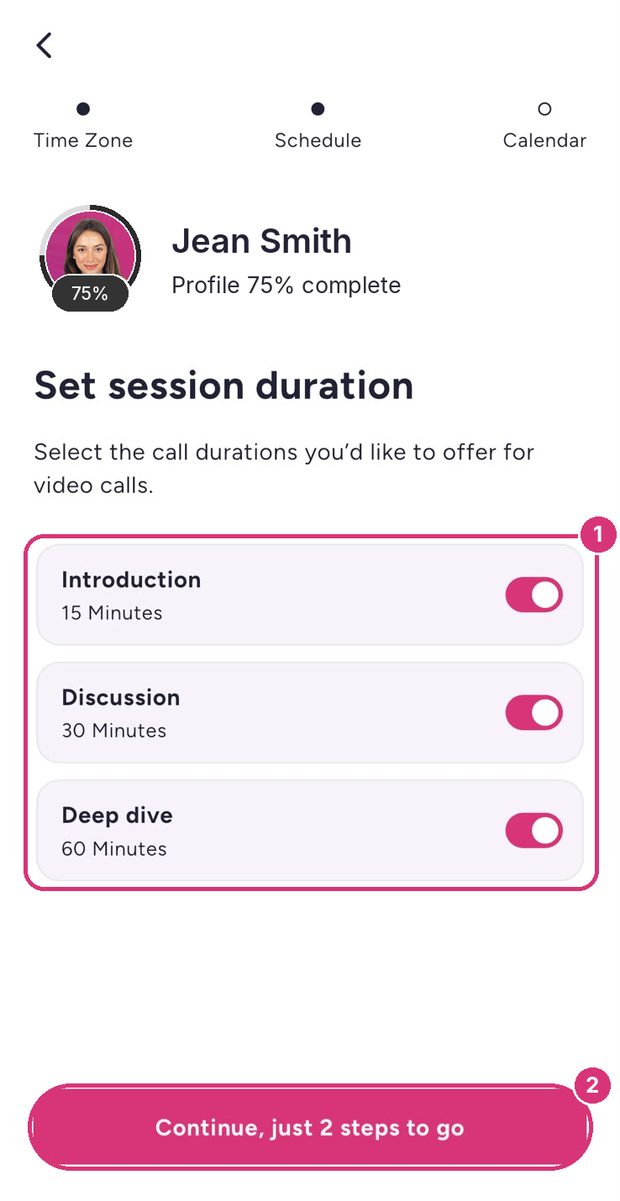
Part 2 · Step 11 of 13
Choose your session lengths
Choose which session lengths clients can book.
- 1Switch on the lengths you want to offer: Introduction (15 minutes), Discussion (30 minutes) and Deep dive (60 minutes).
- 2Tap Continue.
Keep all three on to give clients more ways to book you. The 15-minute Introduction is an easy first step for new clients.
| Session | Length | Client pays | You keep (80%) |
|---|---|---|---|
| Introduction | 15 min | £50 | £40 |
| Discussion | 30 min | £100 | £80 |
| Deep dive | 60 min | £200 | £160 |
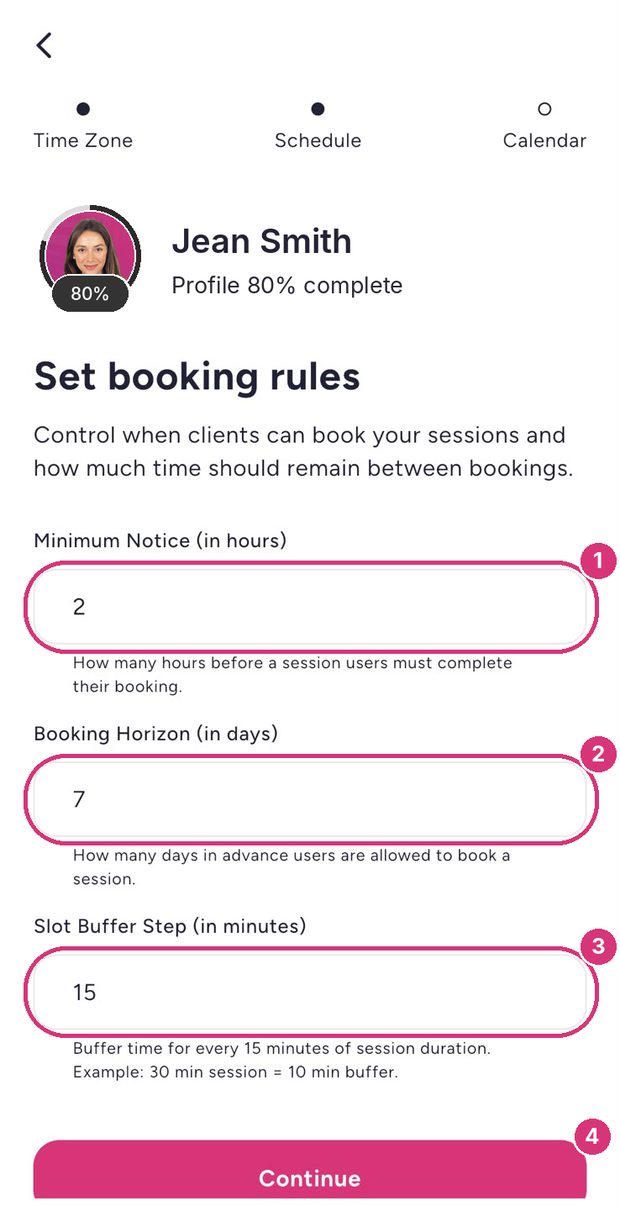
Part 2 · Step 12 of 13
Set your booking rules
Control when clients can book you.
- 1Minimum notice: how many hours’ warning you need before a session, for example 2.
- 2Booking horizon: how many days ahead clients can book, for example 7.
- 3Slot buffer step: the break you get between sessions.
- 4Tap Continue.
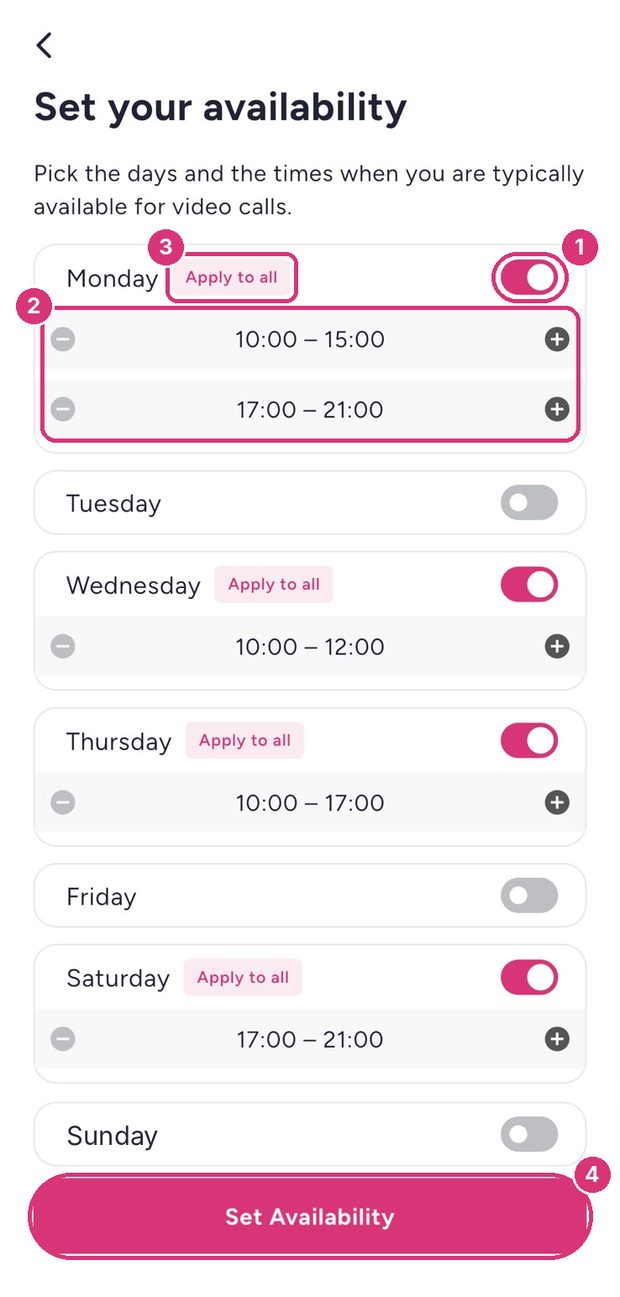
Part 2 · Step 13 of 13
Set your availability
The last step. Tell clients when they can book you.
- 1Switch on each day you’re available.
- 2Tap a time to change it. Use + to add another time slot and − to remove one.
- 3Tap Apply to all to copy that day’s hours to every other day.
- 4Tap Set availability. Your profile is now 100% complete.